

How to Root Brown Turkey Fig Cuttings Without Figging it All Up
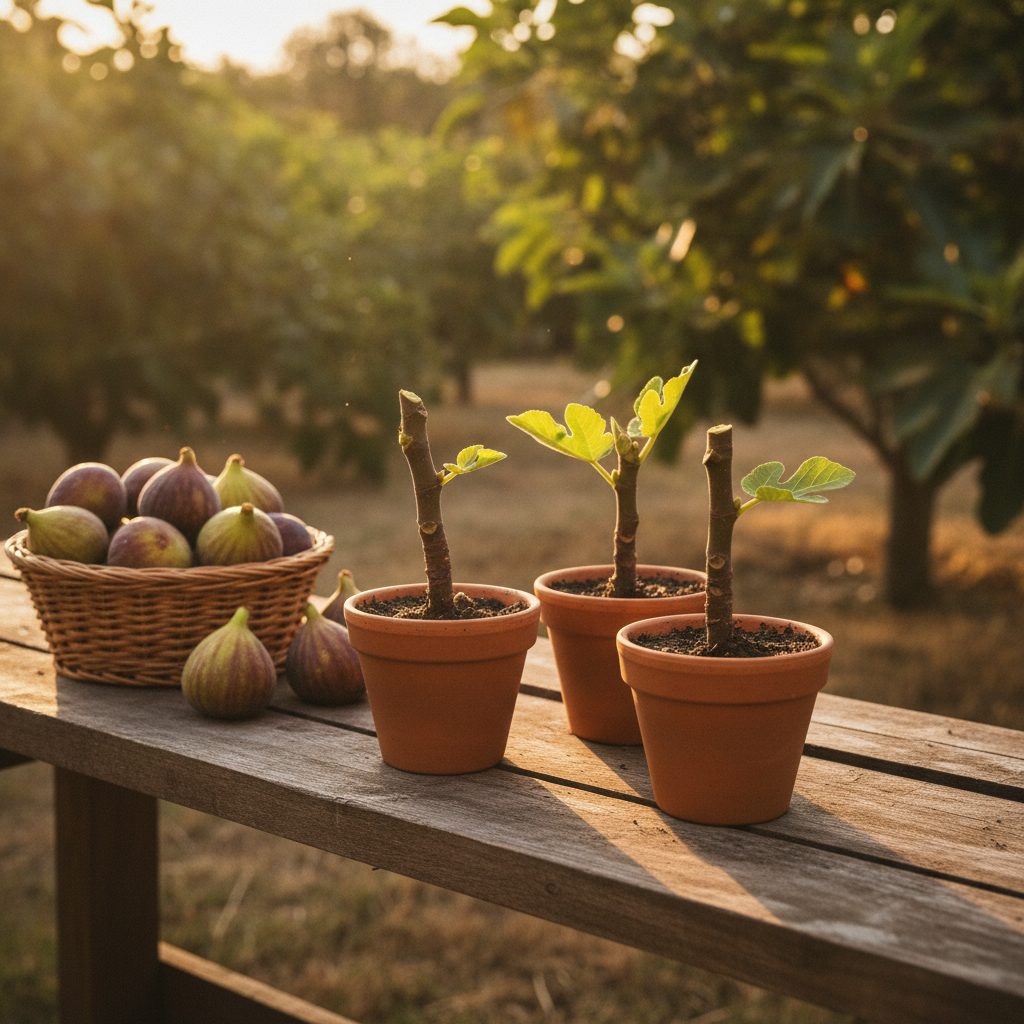
The Gateway Fig: Why We Start with Brown Turkey
So, you’ve decided to play God with a stick. Welcome to the club. If you’re looking to get into the high-stakes, low-oxygen world of fig propagation, the Brown Turkey is your best friend. It’s the Honda Civic of the fig world—reliable, sturdy, and it doesn’t care if you forget to wash it for three months. Whether you call it the Eastern Brown Turkey, the Texas Everbearing, or “that tree in Aunt Linda’s yard,” this variety is a survivor. It’s incredibly forgiving, which is great because, let’s be honest, we’ve all got some plant blood on our hands.
Rooting a cutting is essentially convincing a piece of dormant wood that its life as a branch is over and its career as a root system is beginning. It’s a bit of a psychological trick, and like any good con, it requires the right tools and a little bit of confidence. My goal here is to get you from a bare stick to a leafy, rooted resident of your garden without you “figging” it all up. I’ve rotted more cuttings than most people have ever seen, so I’m telling you what works based on a mountain of moldy mistakes.
Choosing Your Weapon: Selecting the Best Cuttings
You can’t just grab any twig and expect it to turn into a backyard orchard. Success starts with the wood. When you’re taking a cutting from a Brown Turkey, you want wood that is dormant—meaning the tree is asleep for the winter—and about the thickness of a Sharpie or a pencil. If the wood is too thin, it’ll dry out before it can root. If it’s as thick as your arm, you aren’t making a cutting; you’re making a bat. Aim for the “Goldilocks” zone of 1/2 inch to 3/4 inch in diameter.
Look for wood that is about 6 to 10 inches long and has at least three or four nodes. Nodes are those little bumps where leaves used to be. These are the magic spots where the plant stores its undifferentiated cells—basically, the stem cells of the plant world. These nodes are where your roots and your future leaves will emerge. If you don’t have nodes, you don’t have a tree; you have a very expensive stirrer for your coffee.
The “Which End is Up?” Dilemma
This sounds like a joke, but it is the number one reason beginners fail. If you plant a fig cutting upside down, it will eventually realize its mistake, but it’ll be very grumpy about it and will likely die out of pure spite. Most fig growers cut the bottom (the end closest to the trunk) at a flat 90-degree angle and the top at a 45-degree angle. This serves two purposes: it helps water shed off the top so it doesn’t rot the tip, and more importantly, it tells you which end goes into the dirt. Flat bottom, pointy top. Remember it, tattoo it on your forearm, or just mark it with a Sharpie.
Sanitation: Because Mold is the Enemy
Before we put these sticks into their cozy little rooting beds, we have to talk about hygiene. Nature is covered in fungi and bacteria that would love nothing more than to turn your Brown Turkey cutting into a soggy mess. I like to give my cuttings a quick bath in a solution of one part hydrogen peroxide to ten parts water. A quick ten-minute soak kills the surface nasties without hurting the wood.
Also, please—I am begging you—clean your pruners. Don’t use the same shears you just used to hack down the diseased rose bush in the front yard. Wipe them down with isopropyl alcohol. A clean cut is a happy cut. A jagged, crushed end from dull scissors is an invitation for rot to move in and set up shop. Think of it as surgery; you wouldn’t want a doctor using a rusty butter knife on you, so don’t do it to your figs.
The Medium: Where Roots Go to Party
When it comes to rooting medium, everyone has a “secret sauce.” I’ve tried them all, from fancy potting soils to literal bags of dirt I found behind a shed. For a Brown Turkey, you want something that holds moisture but allows for massive amounts of drainage. Fig roots enjoy a drink, but they do not need swimming lessons. If they sit in stagnant water, they will turn into mush faster than you can say “hydroponic heartbreak.”
- Perlite: The white “Styrofoam” looking stuff. It’s great for drainage but holds zero nutrients.
- Coco Coir: Made from coconut husks. It holds water like a champ but stays fluffy so the roots can breathe.
- Vermiculite: Holds a bit more water than perlite. Good for those of us who forget to water.
- The “50/50 Mix”: My personal favorite is half perlite and half coco coir. It’s the perfect balance of “stay hydrated” and “don’t drown.”
Avoid using heavy garden soil or potting mixes with added fertilizers at this stage. Young, tender roots are easily burned by high nitrogen. We want them to hunt for water, not get a four-course meal before they even have a mouth.
Method 1: The “Fig Pop” (Baggy or Cup Method)
The most popular way to root Brown Turkeys is what the cool kids call “Fig Pops.” You take your cutting, wrap the bottom in a moist medium, and seal it in a clear plastic bag or a tall clear cup. Why clear? Because we are impatient humans and we want to see the roots growing without digging the plant up every five minutes.
Wrap the bottom half of the cutting in your moist medium. If you’re using a clear plastic cup, poke a few holes in the bottom for drainage. Place the cutting in the cup, fill it with your medium, and firm it down. You want the cutting to be snug—if it’s wobbling around, it won’t feel secure enough to throw out roots. It’s a trust issue. The plant needs to feel stable.
Cover the top of the cup with another clear cup or a plastic bag to create a mini-greenhouse. This traps humidity. Cuttings don’t have roots yet, so they have to absorb moisture through their bark. If the air is too dry, the cutting will desiccate and turn into a very sad twig.
Method 2: Direct Rooting in the “Totes”
If you’re like me and you suddenly find yourself with fifty cuttings because you “accidentally” pruned your neighbor’s tree, you might need a bulk method. Get a large plastic storage tote, put about three inches of moist perlite in the bottom, and stick your cuttings in there like you’re planting a tiny, weird forest. Pop the lid on, but leave it slightly cracked for airflow. Put the tote on a heat mat set to about 75 degrees Fahrenheit. The bottom heat tricks the plant into thinking it’s springtime, while the cool air above keeps the top of the plant from waking up too fast.
The Waiting Game: Heat, Light, and Patience
Now comes the hardest part of gardening: doing absolutely nothing. For the first two to three weeks, your cuttings just need a warm spot with indirect light. Do not put them in direct sunlight. If you do, you’ll basically be steaming your cuttings inside their plastic containers, and “Steamed Brown Turkey” is a dish no one wants to eat.
Keep the temperature between 70°F and 80°F. If you have a heat mat, use it. If not, the top of the refrigerator is a classic “old school” spot because it’s usually a few degrees warmer than the rest of the house. You are looking for condensation on the inside of the bag or cup. If you see big, fat droplets of water, it’s too wet—open it up and let it breathe. If there’s no fog at all, it’s too dry—give it a light mist.
The “False Start”
About two weeks in, you might see little green leaves starting to pop out of the top. You will be tempted to do a victory dance. Do not dance yet. This is often a “false start.” The cutting is using its stored energy to push out leaves before it has any roots to support them. If the leaves grow too fast, they will exhaust the cutting and it will die. If this happens, keep the humidity high and pray. The real victory is when you see white, fuzzy roots pressed against the side of your clear cup. That is when you can break out the confetti.
Common Mistakes and How to Avoid Them
I have made every mistake on this list, usually more than once. Learn from my expensive “horticultural tuition.”
- Overwatering: This is the big one. If the medium is dripping wet, your cutting is going to rot. It should feel like a wrung-out sponge.
- Checking for roots: Do not pull the cutting out of the dirt to see if it’s rooting. You will break the tiny, microscopic root hairs that are just starting to form. Use clear cups and be patient.
- Too much heat: If you cook the cuttings at 90 degrees, you’re making fig soup. Keep it in the 70s.
- Wrong end up: We talked about this. Don’t be that person. Pointy end up.
Troubleshooting: Why is it Turning Black?
If the tip of your cutting starts turning black or fuzzy, you’ve got mold. This usually happens because of a lack of airflow or too much moisture. If it’s just at the tip, you can sometimes save the cutting by snipping off the moldy bit and cleaning the rest with a little diluted peroxide. If the bottom of the cutting is turning black and mushy, that’s “damping off” or rot. Usually, that cutting is a goner. Toss it, sanitize your container, and start over with a fresh stick. It happens to the best of us.
If you see little flies buzzing around, those are fungus gnats. They love wet soil. They aren’t usually a death sentence for the cutting, but they are annoying. A layer of dry sand on top of your medium or some yellow sticky traps will usually handle them. Just don’t let them move into your house permanently, or you’ll be sleeping on the couch while the gnats take over the master bedroom.
Hardening Off: The Great Outdoors
Once your Brown Turkey cutting has a solid root system (you should see several thick white roots circling the cup) and a few sets of true leaves, it’s time to move it to a real pot with real soil. But don’t just chuck it out into the backyard. Your cutting has been living in a climate-controlled spa for the last six weeks. The real world is harsh, windy, and bright.
Start by moving it to a shady spot outside for an hour a day, gradually increasing the time and the amount of sunlight over a week. This is called “hardening off.” Think of it like a Victorian child—too much sun too fast and it’ll simply faint. Once it’s used to the breeze and the sun, you can pot it up or plant it in the ground if the danger of frost has passed.
Why Brown Turkey is Worth the Effort
I know, I know—some people call the Brown Turkey “basic.” But there’s a reason it’s been around for centuries. It produces two crops a year (a breba crop on old wood and a main crop on new wood), the fruit is sweet and jammy, and the tree itself is tough as nails. Once you successfully root your first cutting, you’ll realize that you now have the power to create an infinite number of trees. You can give them to friends, trade them for other varieties, or just fill your yard until your spouse starts asking questions about where the lawn went.
The Brown Turkey is the perfect variety to learn on because it wants to live. It’s trying its best to help you succeed. Even if you mess up a few times, keep at it. Every failed cutting is just a lesson in what not to do next time. Gardening is 20% knowledge and 80% stubbornly refusing to give up after you kill a plant.
Rooting cuttings is one of the most rewarding parts of the fig hobby. There is a genuine sense of magic when you see those first white roots appearing through the plastic. It’s the moment you realize you’ve actually done it—you’ve made life happen. Now, go grab some pruners, find a Brown Turkey, and start your own little figgy empire. Just remember: stay clean, stay patient, and for the love of all things green, make sure you know which end is up.
Ready to start your orchard or need the right tools to make sure your cuttings actually survive the process? We’ve got everything from premium cuttings to the gear that keeps my twenty trees happy and healthy. Don’t let your fig dreams stay as just sticks in a cup.