

How to Root Brown Turkey Fig Cuttings Without Figging It Up
The Brown Turkey: The “Old Reliable” of the Fig World
So, you’ve decided to propagate a Brown Turkey fig. Excellent choice. The Brown Turkey is basically the golden retriever of the fruit world—it’s friendly, resilient, and it really, really wants to please you. While some boutique fig varieties act like pampered influencers who need a specific humidity level just to wake up in the morning, the Brown Turkey is a workhorse. It’s cold-hardy, prolific, and has a flavor profile that screams “classic figgy goodness.”
But here’s the thing: even though this variety is tougher than a cheap steak, you can still “fig it up” if you aren’t careful. I’ve seen people treat cuttings like science experiments or, worse, like immortal sticks that can survive anything. I’m here to make sure your cuttings actually turn into trees instead of expensive kindling. We’re going to talk about the “how,” the “why,” and the “oh no, what did I just do” of rooting Brown Turkey figs.
Choosing Your Combatants: Selecting the Best Cuttings
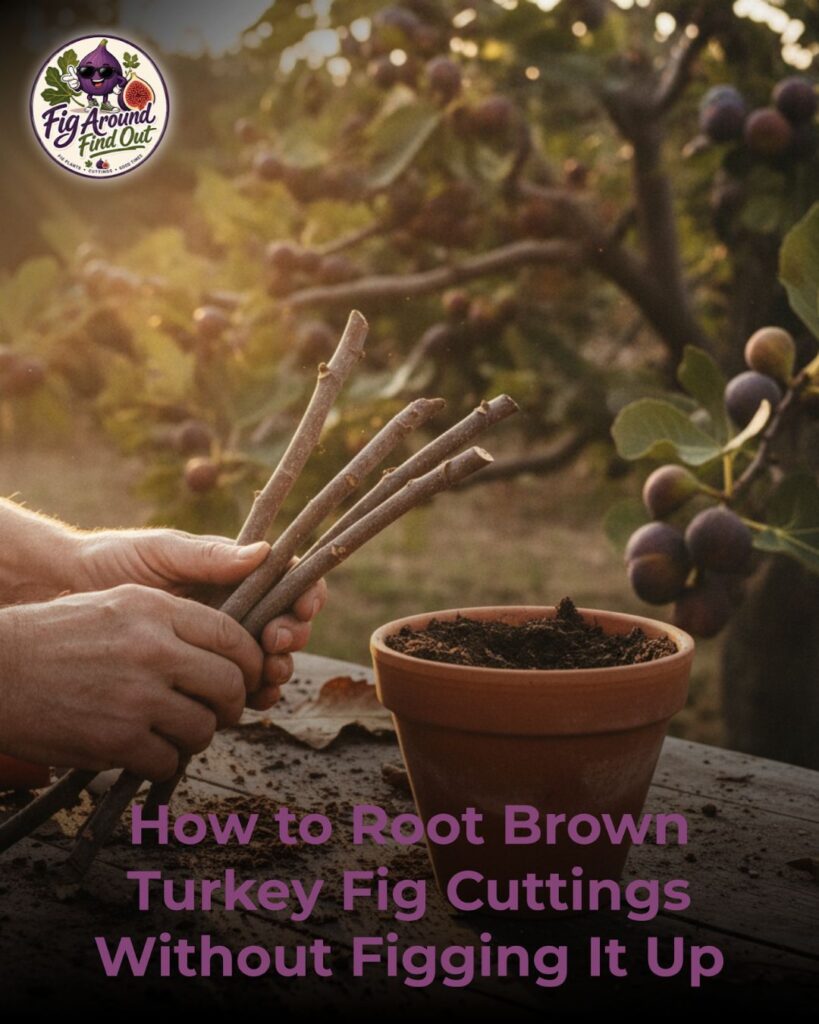
Before we even touch a pair of pruners, we need to talk about selection. You can’t just grab a random twig from the yard and expect magic. Success starts with the quality of your wood. For a Brown Turkey, you’re looking for “dormant wood”—this is growth from the previous season that has turned brown and woody, rather than the green, floppy stuff from this morning.
The Pencil Rule: Your cutting should be roughly the thickness of a pencil. If it’s as thin as a toothpick, it’ll dry out before it can think about growing roots. If it’s as thick as a baseball bat, it’s going to take forever to wake up. Aim for 6 to 10 inches in length with at least three or four “nodes.” Those little bumps on the stick? Those are nodes. That’s where the magic happens. Roots come out of the bottom ones, and leaves come out of the top ones. It’s like a biological multi-tool.
Make sure your pruners are sharp. If you tear the bark, you’re inviting rot to the party, and rot is a guest that never leaves and drinks all your expensive soil nutrients. Wipe your blades with alcohol between plants. We’re growing figs, not a collection of cross-contaminated plant pathogens.
Preparation: The Pre-Game Ritual
Once you have your cuttings, don’t just shove them in the dirt and hope for the best. We need to prep them. First, identify which end is the bottom. I know it sounds silly, but I have absolutely planted a stick upside down in my early days. The buds usually point “up” toward the sky. If you plant it upside down, the plant gets very confused, and honestly, so do I.
The Fresh Cut: Make a fresh snip at the bottom, just below a node. I like to do a flat cut on the bottom and a slanted cut on the top. This does two things: it helps water shed off the top so it doesn’t rot the tip, and it serves as a “this side up” sign for my future self who might be caffeinated and distracted.
To Scrape or Not to Scrape? Some folks like to lightly scrape the bark at the bottom inch to expose the green cambium layer. It’s like giving the roots a “scenic exit” to emerge from. If you do this, be gentle. We’re looking for a light exfoliation, not a deep-tissue massage. If you see white wood, you’ve gone too far.
The Medium is the Message: What to Root In
Fig roots enjoy a drink, but they do not need swimming lessons. If your rooting medium is too heavy, the bottom of your cutting will turn into a mushy, black mess. This is the most common way to fig things up. You want something that holds a little moisture but lets air circulate. Oxygen is the secret ingredient for root development.
- Perlite and Peat: A 50/50 mix is the classic “Goldilocks” setup. It stays damp but drains like a sieve.
- Coco Coir: Great for moisture retention, just make sure it’s rinsed of salts.
- Potting Mix: If you use standard potting soil, mix in extra perlite. You want it fluffy. If it feels like heavy mud, your cutting is going to suffocate.
- The “Figgy Special”: I often use straight perlite or high-quality seed starting mix. It’s light, sterile, and gives the roots zero resistance as they start their journey.
The Methods: Choose Your Own Adventure
There are several ways to root a Brown Turkey, and none of them are “wrong” as long as the end result is a tree. However, some are more foolproof than others.
Method 1: The Direct-to-Pot Method (The “Set it and Forget it”)
This is the most straightforward way. You take your prepped cutting, dip the bottom in a little rooting hormone (optional, but a nice boost), and stick it into a tall pot filled with your moist medium. At least two nodes should be underground.
The key here is humidity. I like to put a clear plastic bag or a cut-up soda bottle over the top to create a mini-greenhouse. This keeps the cutting from drying out while it’s trying to figure out how to be a real tree. Keep it in a warm spot with bright, indirect light. Direct sun will cook your cutting inside that plastic like a rotisserie chicken. We want growth, not lunch.
Method 2: The “Fig Bin” or Tupperware Method
If you have a lot of cuttings, this is the way to go. Line a plastic storage bin with damp paper towels or lightly moistened sphagnum moss. Lay the cuttings in there, close the lid, and put it on a heat mat. Check them every few days for mold. Once you see “callousing” (white bumps at the bottom) or actual roots, you can pot them up.
This method is great because you can see what’s happening without digging them up. It’s like a botanical reality show. “Will Cutting #4 survive the humidity? Tune in Tuesday to find out.”
Method 3: Water Rooting (The “Lazy Gardener” Special)
Yes, you can stick a Brown Turkey cutting in a glass of water on the windowsill. It works surprisingly often because Brown Turkeys are overachievers. However, water roots are different from soil roots. They’re brittle and fragile. When you finally move that cutting into soil, the plant often goes into shock. It’s like moving from a luxury spa to a construction site. It’s doable, but it’s not my favorite way to ensure long-term health.
Temperature: The Secret Sauce
Figs are tropical at heart. They don’t like cold feet. If you’re trying to root these in a 50-degree garage, you’re going to be waiting until the next Ice Age. For optimal rooting, you want the “root zone” (the bottom of the pot) to be between 70°F and 80°F.
A seedling heat mat is the best twenty bucks you’ll ever spend. It provides consistent bottom heat, which tells the cutting, “Hey, it’s spring! Time to wake up!” If the air is a bit cooler than the soil, that’s actually a good thing. It encourages root growth before the leaves start popping out. You want a strong foundation before the penthouse gets built.
Common Mistakes (Or, How I Ruined Everything)
I have killed more cuttings than I care to admit. It’s part of the process. Think of it as “horticultural tuition.” Here are the big ones to avoid:
- Too Much Water: I’ll say it again. If the soil is soaking wet, the cutting will rot. The medium should feel like a wrung-out sponge. If you squeeze it and water pours out, it’s too wet.
- Checking for Roots Too Soon: I know the temptation. You want to pull the stick out of the dirt every three days to see if anything is happening. Don’t. Every time you pull it out, you break those tiny, microscopic root hairs that are just starting to form. Be patient. When you see leaves growing and expanding, that’s your sign that things are moving downstairs.
- Too Much Direct Sun: Until that plant has a root system, it can’t replace the water it loses through its leaves. Blasting it with sun will wilt it faster than my motivation on a Monday morning.
- Fertilizing Too Early: New roots are delicate. If you hit them with high-strength fertilizer right away, you’ll burn them. Wait until the plant has several sets of true leaves and looks established before you start feeding it.
The Hardening Off Process: From Toddler to Teenager
Once your Brown Turkey has roots and leaves, it’s not ready to face the world yet. It’s been living in a climate-controlled paradise. If you move it directly into the hot sun and wind, it will give up on life immediately. This is called “hardening off.”
Start by taking the humidity dome off for a few hours a day. Then, move the pot outside to a shady, protected spot for an hour, then two, then four. Over the course of a week or two, gradually introduce it to more sunlight and wind. It’s like teaching a teenager to drive—start in the parking lot before you hit the highway.
Why the Brown Turkey is Worth the Effort
You might be wondering if all this fuss is worth it for a “common” fig. The answer is a resounding yes. Brown Turkeys are incredibly versatile. They are one of the few varieties that can take a beating from a late frost and still produce a crop on new wood. They have two harvests in many climates: a “breba” crop (early fruit on last year’s wood) and a main crop (later fruit on this year’s growth).
The fruit itself is rich, sweet, and perfect for eating fresh off the tree or turning into preserves that will make your neighbors jealous. Plus, there is something deeply satisfying about knowing that the twelve-foot tree in your yard started as a six-inch stick on your kitchen counter. You didn’t just buy a plant; you made a plant. That’s botanical wizardry, my friend.
Troubleshooting: “Figgy, Help! It’s Not Working!”
If your cutting is turning black from the bottom up, it’s rot. Take it out, cut back to healthy green wood, let it dry for a day, and start over in a much drier, airier medium.
If the buds are swelling but no roots are forming, you might need more bottom heat. The plant is trying to wake up, but it doesn’t have the energy to build roots yet.
If you see white fuzzy stuff on the bark, that’s mold. Improve your airflow and maybe back off on the humidity. A little bit of mold isn’t a death sentence, but it’s a warning that your environment is a bit too “swampy.”
Conclusion: You’ve Got This
Rooting a Brown Turkey fig isn’t a dark art; it’s just a combination of patience, the right temperature, and resisting the urge to over-water. Remember, every master gardener has a graveyard of failed cuttings behind them. Each failure is just a lesson in what not to do next time.
Once you get that first root to pop, you’re going to be hooked. You’ll start looking at every fig tree you pass as a potential source for “just one more” cutting. Your backyard will slowly transform into a Mediterranean jungle, and your friends will start avoiding your calls because they know you’re going to try to give them another sapling. It’s a glorious life.
If you’re ready to start your journey or if you’ve decided that maybe you’d rather start with a tree that’s already figured out the whole “having roots” thing, we’ve got you covered. Gardening is better when you have the right tools and the best genetics to work with.
Ready to add more “Reliable” to your orchard? We have the healthy, vibrant varieties and supplies you need to turn your thumb green without the stress.