


Cut My Fig Into Pieces for Massive Harvests and Pro Cuttings
Why Your Fig Tree Needs a Haircut (and Why You Need the Cuttings)
I know the feeling. You spent all summer watching your Brown Turkey fig reach for the heavens, and now that the leaves have dropped and the tree is taking its winter nap, you’re standing there with a pair of pruners feeling like a monster. You think, “How can I cut this beautiful creature?” But let me tell you something: your fig tree is a bit of a glutton for attention. If you don’t keep it in check, it will turn into a tangled, unproductive mess that requires a ladder and a prayer to harvest.
Pruning isn’t just about keeping things tidy; it’s about redirection. We’re telling the tree, “Stop trying to touch the power lines and start focusing on those delicious, honey-sweet figs I was promised.” Plus, there is a massive bonus: every branch you snip off is a potential new tree. If you play your cards right, you can turn one overgrown Brown Turkey into a small army of clones. It’s basically legal botanical counterfeiting, and I’m here to show you how to do it without losing a finger or killing the parent plant.
The Brown Turkey: The Workhorse of the Fig World
Before we start hacking away, let’s talk about our subject. The Brown Turkey is the “old reliable” of the fig world. It’s hardy, it’s productive, and it’s remarkably forgiving of the occasional gardening mishap. If you’re in a cooler climate, this is likely your best friend because it can take a bit of a chill and still come back swinging in the spring. However, its vigor is also its vice. This variety grows like it’s being chased, which means pruning is mandatory, not optional.
The Brown Turkey typically produces a “breba” crop (early fruit on last year’s wood) and a “main” crop (late fruit on this year’s new growth). Understanding this is key because if you cut every single branch back to a stump, you’re deleting your early summer snack. We want a balance. We want a tree that looks like it’s been to a high-end salon, not a tree that looks like it had a run-in with a frustrated lawnmower.
When to Prune: Timing is Everything
Timing your cuts is the difference between a happy tree and a hormonal disaster. You want to prune when the tree is dormant. In most climates, this is late winter or very early spring, before the buds start to swell. If the tree is still covered in green leaves, put the pruners down. If the tree is leaking white sap like a punctured tire, you’re too late (or too early).
Dormancy is the tree’s version of being under anesthesia. It doesn’t feel the “pain” of the cuts, and the energy is all stored safely in the roots. By pruning now, you’re setting the stage for an explosion of growth the second the soil warms up. Also, dormant wood makes for the best cuttings. It’s packed with stored sugars and hormones, just waiting for a reason to grow roots instead of leaves.
Tools of the Trade: Don’t Be a Butcher
If you take nothing else away from this, remember this: use sharp, clean tools. I’ve seen people try to prune a fig tree with rusty kitchen shears or a serrated bread knife, and it makes my soul ache. A dull blade crushes the branch instead of slicing it, creating a jagged wound that invites disease and rot.
- Bypass Pruners: These work like scissors and are perfect for branches up to an inch thick. They give a clean, precise cut.
- Loppers: For the “I haven’t pruned in three years” branches. These give you the leverage you need for the thick stuff.
- A Folding Saw: For when the branch is more of a trunk.
- Isopropyl Alcohol: To wipe down your blades between trees. We want to share figs, not fungal infections.
The Three D’s: The First Phase of Pruning
Before we get creative with the shape, we have to handle the basics. I call this the “cleaning the house” phase. Look for the Three D’s: Dead, Damaged, and Diseased.
If a branch is brittle and snaps like a dry cracker, it’s gone. If it’s been rubbed raw by another branch or mangled by a wayward frisbee, it needs to go. Removing these isn’t just about aesthetics; it’s about plant hygiene. These branches are not contributing to the group project, and they’re just taking up space where a healthy, fruit-bearing branch could be.
Next, look for “suckers.” These are the thin, whip-like shoots growing straight out of the base of the trunk. They are energy vampires. They suck nutrients away from the main structure of the tree and rarely produce good fruit. Snip them off at the ground level. Your tree will thank you by putting that energy into making actual figs.
Thinning and Heading: Shaping the Future
Now we get to the fun part. We want to open up the center of the tree to let light and air in. If the center of your fig tree is a dark, tangled jungle, your fruit will rot before it ever ripens because there’s no airflow. Think of your tree like an open chalice or a vase.
Thinning cuts involve removing an entire branch back to where it meets a larger limb. Use these to reduce crowding. If two branches are crossing and rubbing against each other, pick the weaker one and show it the exit.
Heading cuts involve shortening a branch. This encourages the tree to branch out and become bushier. When you make these cuts, always cut about a quarter-inch above a “node” (the little bump where a leaf or branch grows). Try to cut at a 45-degree angle sloping away from the bud so rain runs off rather than sitting on the cut like a tiny, infectious puddle.
Harvesting the Gold: Taking Your Cuttings
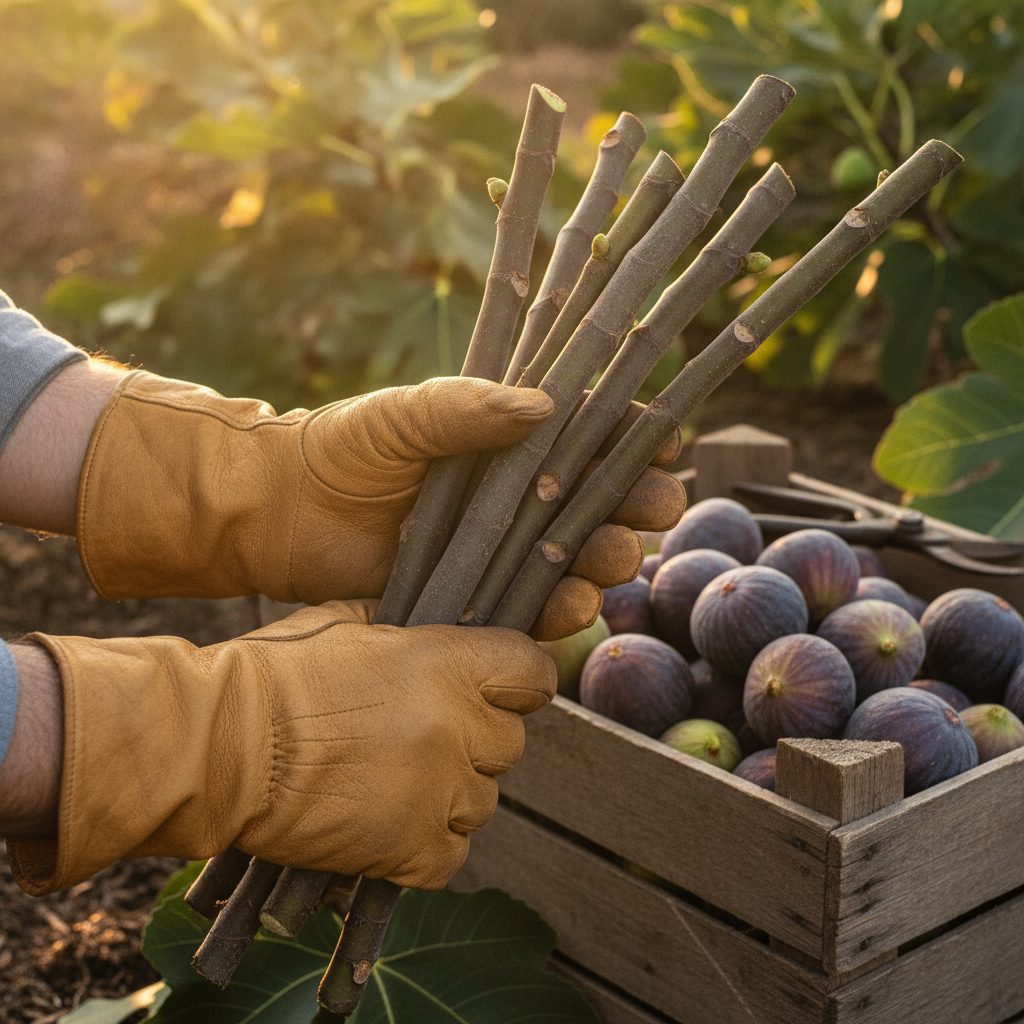
While you’re pruning, don’t you dare throw those branches in the green bin. That is literal garden gold. We are going to turn those “scraps” into Brown Turkey fig cuttings. This is the part where you get to feel like a mad scientist.
The ideal cutting is about 6 to 10 inches long and roughly the thickness of a Sharpie or your pinky finger. You want wood that grew this past year—it usually looks a bit lighter in color and smoother than the older, grey bark. Make sure your cutting has at least three or four nodes. The bottom of the cutting (the part that was closest to the ground) should be cut straight across, right below a node. The top should be cut at an angle. This isn’t just for style; it helps you remember which end is “up.” Planting a fig cutting upside down is a classic rookie mistake, and while figs are resilient, they aren’t “defy the laws of gravity” resilient.
Storing and Prepping Cuttings
If you aren’t ready to plant your cuttings immediately, you can store them in the refrigerator. Wrap them in a damp (not dripping) paper towel, put them in a zip-top bag, and tuck them into the crisper drawer. They can hang out there for several months. I’ve found cuttings in the back of my fridge behind a jar of pickles three months later that still rooted perfectly. Just don’t let them dry out, and don’t let them freeze.
When you’re ready to root them, you have options. Some people swear by the “fig pop” method (wrapping the bottom in moist moss and plastic), some like sticking them straight into a pot of well-draining soil, and some use the water method. Personally, I like the direct-to-soil approach. It’s less fuss, and the roots that develop in soil are tougher than “water roots,” which are often fragile and prone to temper tantrums when they finally touch dirt.
The Rooting Process: Patience is a Virtue (That I Struggle With)
Stick your cuttings into a pot filled with a mix of potting soil and perlite. You want the soil to be light and fluffy—roots need oxygen just as much as they need water. Bury at least two nodes under the soil; this is where the roots will emerge. Keep the pot in a warm spot with indirect light.
Now, here is the hard part: leave them alone. Do not pull them out every three days to see if they have roots yet. You wouldn’t dig up a potato every morning to see if it’s growing, would you? (If you would, we need to have a different conversation). You’ll know they are rooting when you see new green growth pushing out from the top. Once you see significant leaf development, you’ve officially successfully cloned your tree. Congratulations, you’re now a nursery owner. Tell your spouse it’s a business venture; it sounds better than “I have a problem.”
Common Pruning and Cutting Mistakes
I’ve made them all so you don’t have to. Here is the “What Not To Do” list:
- Over-pruning: Don’t take off more than a third of the tree in a single year. If you go too far, the tree might panic and send out a forest of unproductive suckers. It’s a marathon, not a sprint.
- Leaving “Stubs”: Always cut back to a node or a main branch. Leaving a two-inch “peg” is just an invitation for rot to enter the tree.
- Using Too Much Water: When rooting cuttings, “moist” is the goal. “Soggy” is the enemy. If the soil smells like a swamp, your cuttings are probably rotting. Fig roots enjoy a drink; they do not need swimming lessons.
- Giving Up Too Early: Sometimes a cutting looks like a dead stick for six weeks before suddenly exploding into life. As long as the wood is green when you gently scratch the bark with a fingernail, there is hope.
Climate Considerations for Brown Turkeys
Your pruning strategy might change slightly based on where you live. If you’re in a very cold zone (Zone 6 or lower), you might want to grow your Brown Turkey as a bush rather than a tree. This makes it easier to wrap or protect during the winter. In these cases, you’ll prune to keep the plant low to the ground.
In warmer zones (Zone 8 and up), your Brown Turkey might try to take over the neighborhood. You’ll need to be more aggressive with your thinning cuts to ensure the center stays open. In these climates, the tree grows so fast that you can almost hear it, so don’t be afraid to be firm with your pruners.
Summary: Cut, Grow, Repeat
Pruning your Brown Turkey fig shouldn’t be a source of anxiety. It’s an act of love. You’re giving the tree the structure it needs to be its best self, and in return, it’s giving you the material to start a whole new generation of plants. Every cut is a lesson, every cutting is a potential harvest, and every mistake is just “horticultural tuition.”
Remember: keep your tools sharp, your cuts clean, and your sense of humor intact. Gardening is supposed to be fun, even when we’re hacking things into pieces. Before you know it, you’ll have more figs than you can eat and more trees than you have space for. And that, my friend, is exactly where you want to be.
If you’re ready to start your fig journey or need the right tools and varieties to expand your orchard, we’ve got you covered. Don’t let your garden goals stay as just goals—get your hands dirty and start growing something amazing today.