

Fig Around and Don’t Kill Your Brown Turkey Fig Cuttings
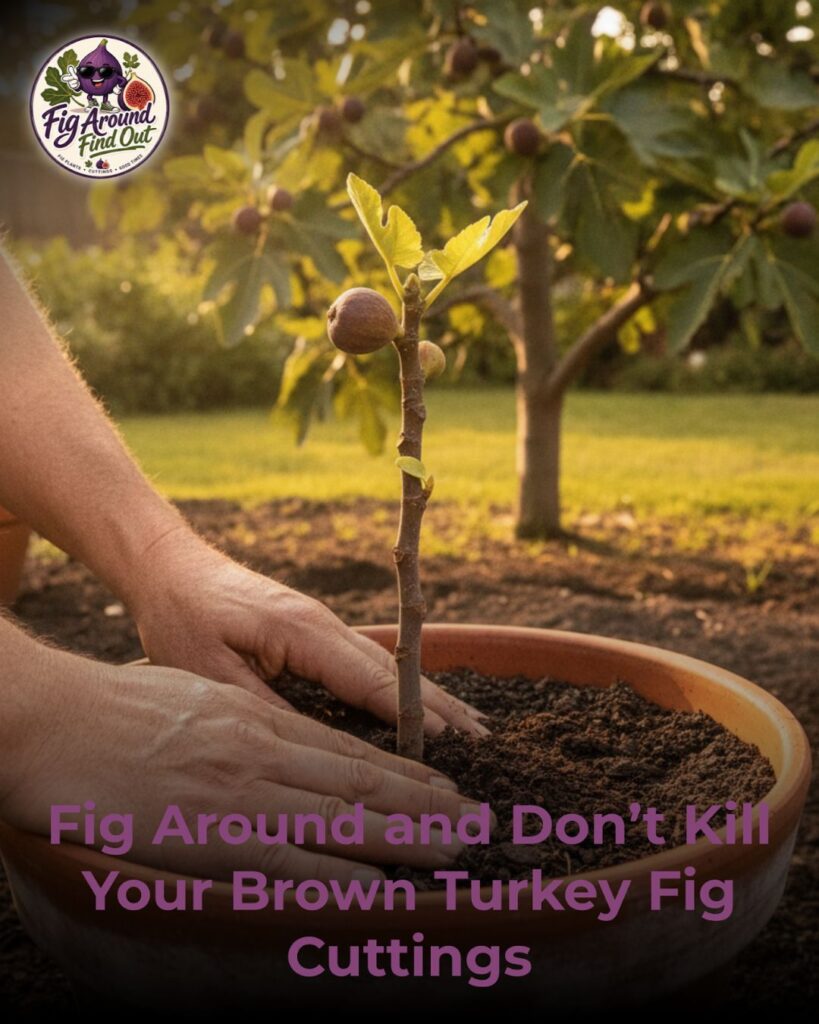
The Art of Not Turning Your Brown Turkey Cuttings into Expensive Compost
So, you’ve decided to propagate a Brown Turkey fig. Excellent choice. You’re looking at a variety that is the “Old Reliable” of the fig world—hardy, productive, and forgiving enough to tolerate a little bit of horticultural neglect. But let’s be honest: even though Brown Turkeys are the tanks of the Ficus carica family, people still manage to turn their cuttings into soggy, moldy sticks of disappointment. I know because I’ve done it. I’ve killed enough cuttings to fill a small graveyard, all in the name of “learning.”
Propagating fig cuttings is essentially a magic trick. You take a dormant piece of wood, convince it that it’s not actually dead, and trick it into growing a whole new circulatory system. If you do it right, you get a tree that will outlive your mortgage. If you do it wrong, you get a science project in a plastic cup. Today, we’re going to make sure you get the tree. We are going to cover everything from the “napkin method” to the “direct-to-dirt” approach, specifically tailored for the robust personality of the Brown Turkey.
Why the Brown Turkey is the Perfect Starter Fig
If you’re new to the fig game, the Brown Turkey is your best friend. In the world of rare fig collectors, some varieties are like high-maintenance sports cars—they need a specific humidity, a certain soil pH, and they might just die if you look at them sideways. The Brown Turkey is more like a 1998 pickup truck. It’s rugged, it produces heavy crops of sweet, mahogany-colored fruit, and it’s remarkably resilient to temperature swings.
Because of this vigor, Brown Turkey cuttings usually root faster and more reliably than many of their finicky cousins. They have a high concentration of auxins (those lovely natural growth hormones), which means they are itching to grow. However, that vigor can be a double-edged sword. If you give them too much water, they rot just as fast as any other variety. The goal is to balance their natural enthusiasm with a stable environment.
The Anatomy of a Success-Prone Cutting
Before we talk about dirt and water, we have to talk about the sticks themselves. You can’t just go out there with a pair of dull kitchen scissors and hack off a branch. Your cutting needs to be prepared for the journey ahead.
First, check your wood. You want second-year wood or well-hardened first-year growth. It should be about the thickness of a Sharpie or a pinky finger. If the wood is green and floppy, it’s too young; it doesn’t have enough stored energy to survive the rooting process. If it’s as thick as a baseball bat, it’s too old and might take forever to wake up. Aim for that “Goldilocks” zone of pencil-to-marker thickness.
Next, let’s talk about nodes. Nodes are those little bumps on the stem where leaves used to be. This is where the magic happens. When you make your bottom cut, do it just below a node at a 45-degree angle. This exposes the cambium layer (the green “veins” under the bark) where roots are most likely to sprout. For the top cut, I like to go about an inch above a node and cut it flat. Why the different angles? Aside from looking professional, it helps you remember which end is “up.” Planting a cutting upside down is a classic rookie move that results in a very confused, very dead stick.
The Pre-Rooting Ritual: Cleaning and Prepping
Hygiene matters. You wouldn’t have surgery in a dumpster, so don’t ask your cuttings to grow in a petri dish of bacteria. I always wash my cuttings in a very dilute solution of water and a drop of dish soap, or a quick dip in a 10% bleach solution followed by a thorough rinse. This removes fungal spores and hitchhiking pests that are just waiting for a warm, humid environment to ruin your day.
Once clean, I highly recommend “wounding” the base of the cutting. Use a clean knife to gently scrape away a thin sliver of the outer bark on the bottom inch of the cutting, exposing that bright green cambium. This creates more surface area for roots to emerge. You don’t need to go deep—we’re giving it a “paper cut,” not a “chainsaw wound.”
Do You Need Rooting Hormone?
With Brown Turkeys, rooting hormone is optional but helpful. These guys are naturally motivated. However, a little dusting of rooting powder or a dip in rooting gel can provide that extra nudge, especially if you’re rooting in the dead of winter when the plant’s internal clock is telling it to sleep. If you use it, don’t overdo it. A light dusting is plenty; caking it on can actually inhibit root growth by causing the base to rot.
Method 1: The “Fig Pop” or Baggy Method
This is my personal favorite for Brown Turkeys because it saves space and lets you see exactly what’s happening. It’s basically a high-tech Ziploc baggie setup. You wrap the bottom of the cutting in moist (not wet!) sphagnum moss or a coconut coir mix, wrap it in plastic wrap or put it in a bag, and secure it with a rubber band.
The trick here is the moisture level. If you squeeze the moss and water drips out, it’s too wet. It should feel like a wrung-out sponge. You want enough moisture to encourage roots, but enough air to prevent the wood from fermenting. Place these “pops” in a warm spot—on top of a refrigerator or a germination mat—and wait. In two to four weeks, you’ll see white root tips pressing against the plastic. It’s like watching a slow-motion firework show.
Method 2: The Direct-to-Drip Method (Container Rooting)
If you prefer a more traditional approach, you can go straight into a potting medium. Use a tall, narrow container with plenty of drainage holes. I love clear plastic cups for this because, again, I’m impatient and want to see the roots. Just make sure to poke holes in the bottom; if you don’t, you’re essentially building a tiny, stagnant swimming pool for your fig, and figs are terrible swimmers.
Use a very airy medium. A mix of 50% perlite and 50% peat moss or coco coir works wonders. Some people use 100% perlite. The goal is drainage and aeration. Stick the cutting about two-thirds of the way into the medium, leaving at least two nodes above the surface. Firm the soil around it so there are no air pockets, and give it a light watering.
The Three Silent Killers of Fig Cuttings
Even with the hardy Brown Turkey, there are three main ways you’re likely to mess this up. Let’s address them before they address your plants.
- Excessive Moisture: I will shout this from the rooftops until I’m blue in the face. Wet soil kills. Damp soil heals. If your medium is soggy, the cutting will rot from the bottom up. If you see the bark turning black or mushy, you’ve over-watered. It’s a hard lesson, but we’ve all been there.
- Too Much Heat: While figs love warmth, a heat mat set to “nuclear” will cook the delicate new cells. Aim for a soil temperature between 70°F and 78°F. If you don’t have a thermostat, put a towel between the mat and your containers.
- Impatience: This is the big one. You’ll see green leaves start to emerge from the top of the cutting and think, “Aha! I am a gardening god! It has grown!” Slow down, Sparky. Often, a cutting will use its stored energy to push out leaves before it has grown a single root. If you move it to a bigger pot or take it outside too soon, it will wilt and die because it has no way to drink. Wait until you see vigorous root growth against the sides of the container before you celebrate.
Managing the “Green-Up” Phase
Once those first leaves appear, your Brown Turkey cutting has entered a delicate stage. It’s like a teenager—it thinks it’s grown-up, but it still needs a lot of support. If you’re rooting indoors, the air is likely too dry. A humidity dome (or a clear plastic bag draped loosely over the top) can help prevent the new leaves from drying out while the roots catch up.
However, you must provide airflow. If you seal it up tight, you’re creating an all-you-can-eat buffet for mold. Open the dome for an hour every day to let fresh air circulate. If you see fuzzy white mold on the stems, wipe it off with a Q-tip dipped in diluted hydrogen peroxide and increase the airflow immediately.
Lighting: Don’t Scorch the Baby
New cuttings do not need full, direct sun. In fact, direct sun through a window can bake them. They need bright, indirect light. A north or east-facing window is usually perfect. If you’re using grow lights, keep them at a respectful distance. You want the plant to reach for the light a little bit, not get a sunburn before it’s even had its first birthday.
When to Pot Up: The Big Move
You’ll know it’s time to move your Brown Turkey to a permanent gallon-sized pot when you see a thick web of white roots circling the bottom of your clear cup. The roots should look firm and white, not brown or slimy. At this point, the plant has successfully transitioned from “stick” to “tree.”
When transplanting, use a high-quality potting soil with good drainage. I like to add a bit of extra perlite even to the “premium” stuff. Be gentle with the roots; they are brittle at this stage. Once it’s in its new home, give it a good soak and keep it in the shade for a few days to recover from the shock. Gradually introduce it to more sunlight over the course of a week. This is called “hardening off,” and it’s the difference between a thriving tree and a shriveled stick.
Climate Considerations for Brown Turkey Figs
The Brown Turkey is famous for being “Ever-bearing,” which is a fancy way of saying it has a long harvest window. If you live in a colder climate (Zone 6 or 7), your Brown Turkey might die back to the ground in a harsh winter, but it usually grows back from the roots and still gives you fruit on the new wood. If you’re in a warmer zone (Zone 8-11), this thing will grow like a weed.
Because Brown Turkeys are so vigorous, they are excellent candidates for container growing. If you have limited space or live in a tundra-like environment, keep your fig in a large pot and wheel it into the garage for the winter. Just make sure the garage doesn’t drop below 20°F for extended periods, or even the mighty Brown Turkey might throw in the towel.
Troubleshooting Common Issues
If your cutting is looking sad, check these things first:
- Yellowing Leaves: Usually a sign of over-watering or a nutrient deficiency. Since cuttings shouldn’t be fertilized until they have several sets of leaves, it’s almost always too much water.
- Dropping Leaves: Sudden changes in temperature or humidity. Figs are drama queens when their environment changes. Keep it stable.
- No Growth After 6 Weeks: Sometimes, a cutting is just a dud. If the wood is still green when you scratch it, it’s alive—just stubborn. Give it more time and check your soil temperature.
The “Figgy” Philosophy of Propagation
At the end of the day, propagation is a numbers game. Even the pros don’t have a 100% success rate. If you want one Brown Turkey tree, start five cuttings. If they all live, congratulations—you now have four amazing gifts for your neighbors, or four more reasons to start your own backyard orchard. Don’t stress the failures. Every dead cutting is just a lesson in what not to do next time.
Growing figs is addictive. Once you see that first Brown Turkey cutting take hold and start pushing out those iconic lobed leaves, you’re going to want to root everything in sight. You’ll find yourself eyeing your neighbor’s trees, wondering if they’d notice a small pruning snip. You’ll start researching rare Italian varieties and debating the merits of different potting mixes at 2:00 AM. It’s a wonderful, delicious rabbit hole to fall down.
The Brown Turkey is your gateway drug. It’s reliable, it’s sweet, and it’s tough as nails. Treat your cuttings with a little respect, keep the water in check, and be patient. Before you know it, you’ll be standing under a canopy of green, eating sun-warmed figs and wondering why you ever bothered growing anything else.
If you’re ready to start your journey or need to expand your collection because “just one more” turned into twenty, we’ve got the goods to help you succeed. From high-quality cuttings to the gear that keeps them happy, we’ve got your back.